
Punch Needle / Rug Hooking Embroidery Workshop
Punch Needle workshop was taken by Mr. Balkishan to students of the Fashion Design Department.
This technique goes back hundreds or maybe even thousands of years, it is considered to be very popular and takes on looks from primitive to modern. Our contemporary version of punch needle began in the late 1880s, evolving from more traditional rug hooking techniques, to become the art form we know today.
Instead of stitching through the fabric, the punch needle pushes thread or yarn into the fabric, while keeping the needle on the surface. It is a wonderful and very creative way of Embroidery and students really were very Excited to know what the end product looks like.
The result of Punch Needle embroidering is a highly textured design made of loops that shows off its connection to rug making. Like any embroidery , punch needles take some practice to get the best results. But after finding the right movements and the technique , it goes quickly so you can fill a large area faster
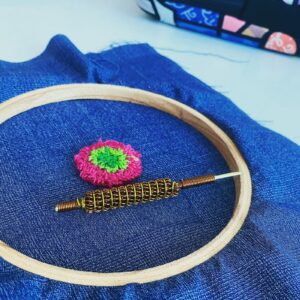
Punch needle embroidery requires almost the same tools as any other embroidery requires , but you also need some specialized tools . You may find some of these at your local craft store,and it’s also available online. Basic Tools Required for Punch Needle Embroidery Are the first and the main tool Punch Needle A punch needle tool has a metal tip with a hole through it, much like a regular needle. But this needle has a channel through which the thread or yarn runs. Punch needle tools also have a handle that makes it easy to grip as you work and makes the work easier and faster.
Monk’s cloth is the most common fabric for a Punch Needle. This even weave fabric comes in different varieties, and is very easy to work with .It’s always advisable to use finer weave for fine threads and coarse weave for thicker threads.
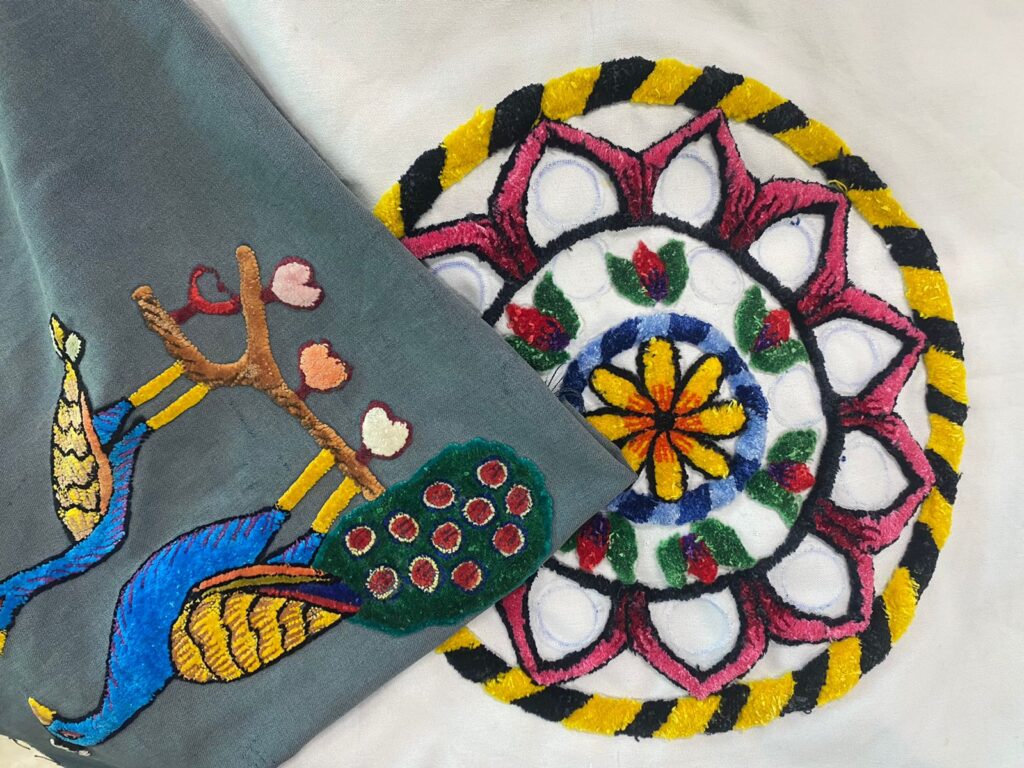
The selection of the thread depends on the Needle as well as the Fabric we are working with, and many contrast colors can be used for the Embroidery to make it look more Attractive and Colorful. But it’s advisable to first get a hand on embroidery technique with one single color and then start using the combinations of colors to make it more attractive
Standard embroidery hoops can be used which we use for other hand Embroidery as well , as they hold the fabric stretched lightly. If you plan on doing a lot of punch needle, you should invest in a frame with carpet tacks or gripper strips, which hold the fabric tighter. Another option is to use a staple gun to attach the fabric stretched onto a wooden frame, which then becomes the frame for your project.
And we also need some small materials apart from these important materials , like scissors , Marking paper and pen to transfer the design onto the paper .
To begin a punch needle Embroidery , stretch the fabric and fix it tightly in the embroidery frame by avoiding the wrinkles Transfer your pattern to the cloth.
Next, thread the Punch Needle tool with yarn. Working from the back or “wrong” side, use the tool to make a series of stitches in the fabric. Each stitch creates a loop of yarn that’s held in place by the tension in the foundation fabric.
When the pattern is complete, take out the cloth from the embroidery frame. Trim the remaining yarn ends and straighten any stray loops. Finish the back or the edges as required.

Let us talk about now how actually the Punch Needle works
The Punch Needle makes a series of continuous thread loops. Each time you insert the through the holes in the main fabric, it pushes down a length of yarn. When you bring the tool back up to the surface of the fabric, the length of yarn folds up to form a loop. The woven foundation fabric holds the loops in place while you make the next stitch. As you fill in the design, the tension of all the loops packed together keeps everything securely in place.
Traditionally, Punch Needle embroidery patterns are worked from the back side, or “wrong”, side of the fabric. For this reason, patterns are traced in the reverse. The backside of a finished project looks more like embroidery, while the front side or the right side has loops that look like a hooked rug.
If you care to learn further about how workshops are structured at LISAA School of Design, please click below to get in touch with our team.